

I love my nails. For me, painting my nails has always been a bit of a luxury that rarely made sense. In high school, I played sports and kept my nails short for practical reasons. Normal life ensured freshly painted nails woudl be chipped within hours – gel nails weren’t a thing back then, and even if it were, I wouldn’t have dished out the cash.
In undergrad, I was broke.
Post-uni, I moved to Chicago and would occasionally splurge on a mani-pedi (I found a wonderful spa that did the combo for $25! But that would last perfectly for a few days before chipping.
Then, I moved to Thailand to become a SCUBA instructor. Let’s just say that lugging heavy diving gear, setting up equipment, and spending all my waking hours under salt water or chlorinated water wasn’t ideal for long pretty nails. BUT… I did get turned on to gel nails, and these WOULD last me a couple of weeks before they would peel off (for non-mermaids, they tend to last until you remove them or they grow out.
In Thailand, I can get my gel nails done for about $10 USD, and my lady is an absolute artist! Check out these cute nails she did for my wedding! (Yeah, that was on the cheap, too!)
That’s all handpainted art done meticulously with love! *Le sigh!*
Now, when I’m back in the US or Australia, I’ll rarely shell out the cash required to just get a normal coat of paint on my nails, let alone fancy shmancy details like I’m spoiled with here.
So my sister (also a master of the HGC-lifestyle!) turned me onto gel nail stickers. Let’s discuss!
Pros and Cons of Gel Nail Stickers Versus Salon Gel Nails:
Now, these gel nail stickers aren’t the same quality as salon-painted nails, but they definitely come with their own set of pros and cons. Let’s start with the pros…
Pros of Gel Nail Stickers
- Gel nail stickers are incredibly affordable. You can buy a pack of 30 for the cost of lunch.
- They are long lasting (up to 2 weeks) if you cure them under a UV lamp, which is surprisingly inexpensive.
- They don’t destroy your nails to the same level as the salon (I have to go month on/month off when I use my salon artist to prevent my nails from getting too thin).
- They’re easy and quick to apply – you can easily do it while watching your favorite show.
- You can get creative and apply designs and pre-made art! You can even take unused, leftover pieces and cut them into strips or shapes to use as designs.
- They tend to peel off when they die, rather than grow out, which is a plus in my book.
- You can change colors more frequently.
- Our recommended brand is vegan and cruelty free! So they aren’t just good for your glow, they’re good for your soul, too!
Cons of Gel Nail Stickers
- They don’t last as long as salon gel nails.
- They may not entirely cover your whole nail the first few times you apply them, it’s a learned skill.
- They still eat away at the thickness of your natural nail, but not to the extent of the salon.
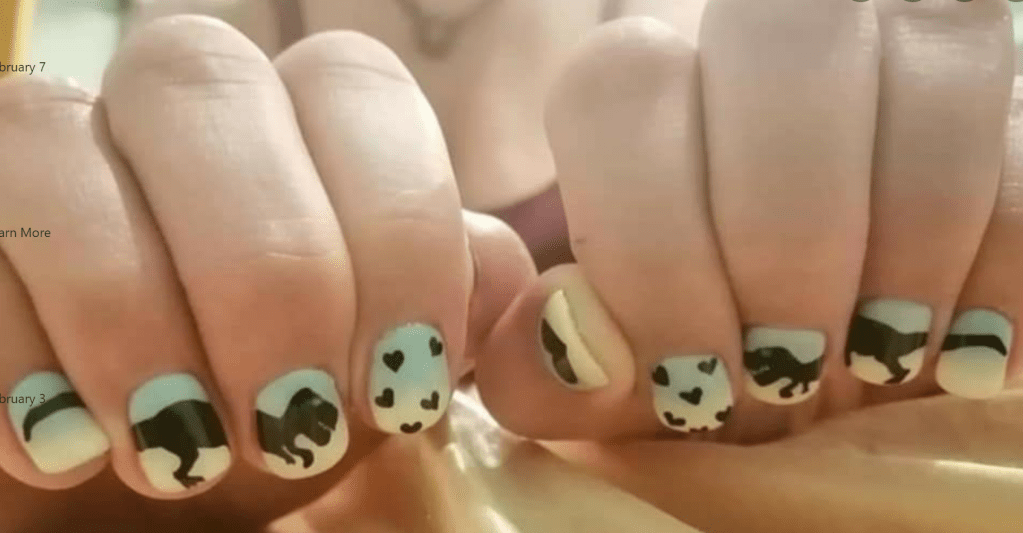
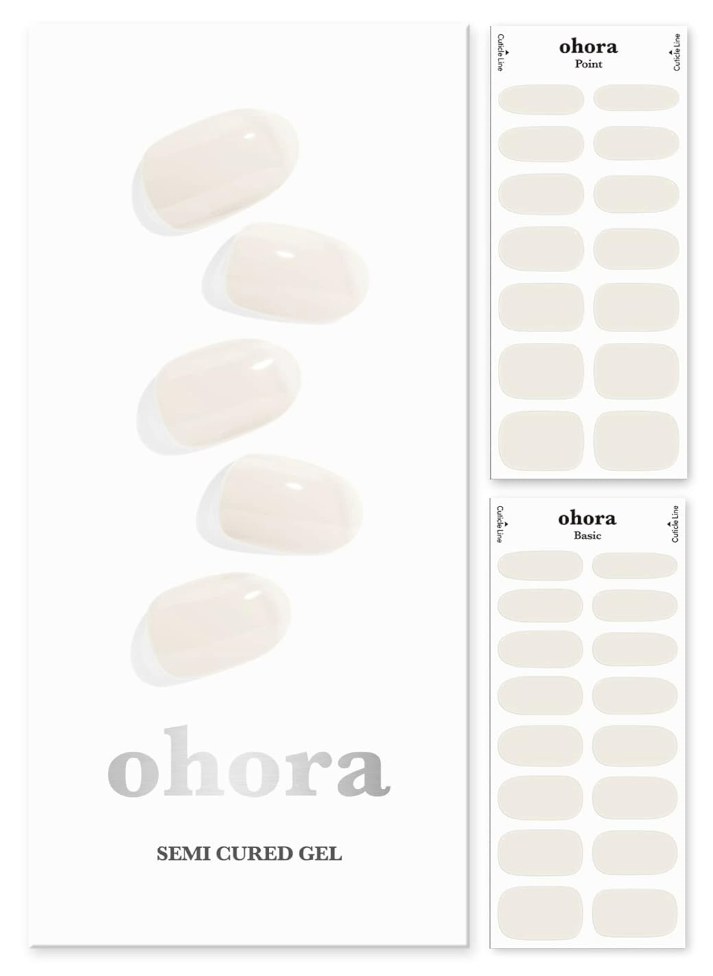
Sold yet? Here’s a few photos from the brand I recommend:

Cute, right?

I love the white nail look for autumn, especially when worn with warm golds, browns, and sunset-colors!
How Do You Apply Gel Nail Stickers?
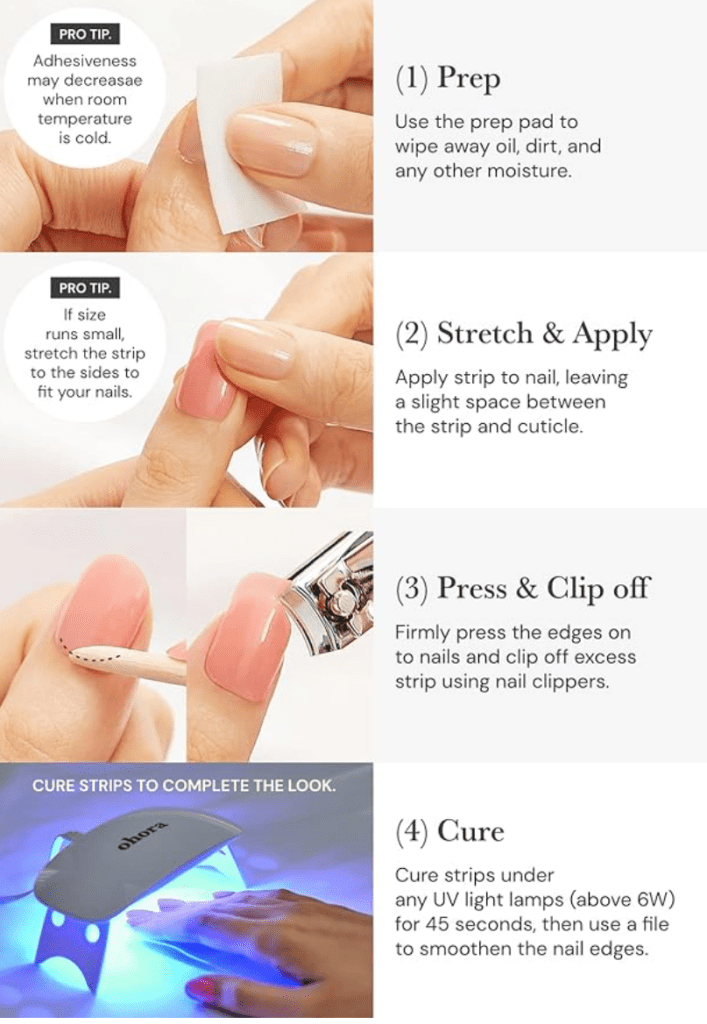
You might be intimidated by the application process, but rest assured it’s not complicated. In fact, it’s so easy, my mother can do it!

Step 1: Prep
Use the included prep pad to clean your nails and wipe off any moisture, oil, and dirt. This ensures the stickers will stick to your nails. I’d also recommend that you trim away any hangnails and tidy up your cuticles if you have time, but that’s totally up to you.
Be sure you don’t touch your nails after cleaning them! If you do, then clean them again to remove the oils from your fingers, otherwise the stickers may not stick as well as they could.
Make sure your room isn’t too cold, or they may not stick as well as they could.
Step 2: Stretch and Apply
Choose the right sticker size for your nail. It’s ok if it’s a little too narrow for your nail because the stickers stretch a bit. Just apply the sticker to the middle of your nail while leaving a slight space on either side. Then stretch the sticker to the sides to fit your nails.
Step 3: Press and Clip
Now, firmly press the sticker from the middle of the sticker outward to the edge until you are happy with its placement. Use fingernail clippers to clip off the excess sticker.
Step 4: Cure
This step isn’t 100% necessary, but it will extend the life of your gel nails and the curing lamp is reasonably affordable.
Cure your nails for 45 seconds between one and three times and your done! Enjoy your nails for the next 1-2 weeks or until you are ready for a change, then remove and repeat!
Nails with thicker gel, nail gems, or decals will need longer curing times.
Our Preferred Brand
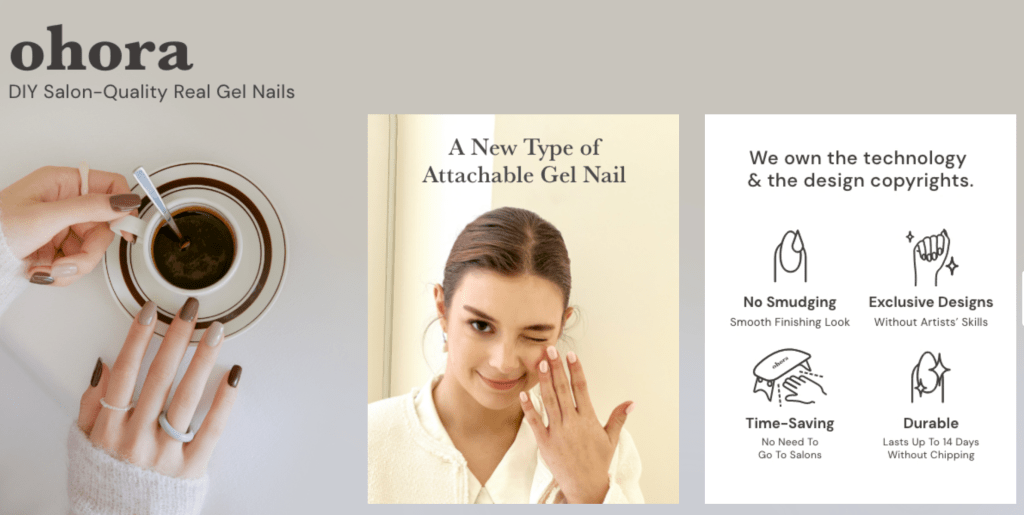
I really like the ohora brand. You can get brands that don’t require curing under the UV light, but these last longer, especially if you couple it with the brand’s pro glossy top gel. I love the overcoat, because you can seal in additional designs that you may choose to place over your base color.

I also like that ohora is vegan and cruelty free. I’m not a vegan myself, but I know many of my readers are, and I appreciate that these nails are more inclusive. And who doesn’t love cruelty-free? Aside from Disney villains, of course.
Removing Your Gel Nail Stickers
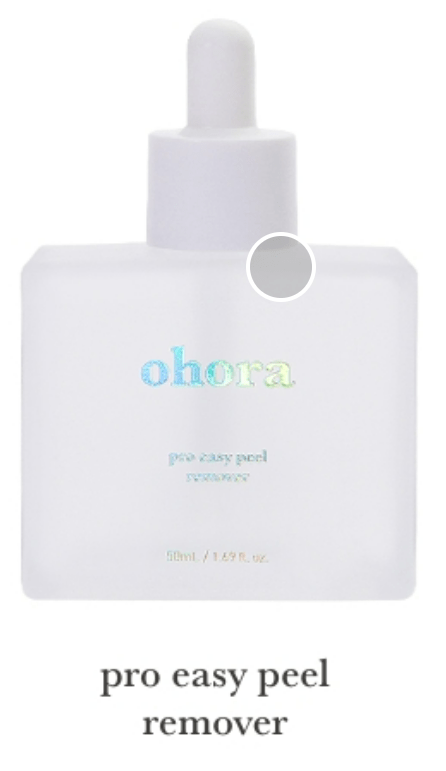
You can remove your gel stickers by either using the ohora pro easy peel remover or regular acetone. But if you’re not using ohora’s nail remover, take your time with the process to avoid damaging your nails!
Purchasing Your Ohora Nail Set
Ok, so this product comes with a few parts. I would recommend you take it slow and just purchase the necessities to ensure you like it and will actually use it before you go all-in.
So the necessities are the following:
- A set of ohora gel nail stickers.
- A UV light
- Nail clippers – these extra sharp and sturdy ones are great!
Once you know you like it (and I’m certain you will if you like pretty, long-lasting nails at a cheap price), then you can slowly splurge on some of the other accessories, including:
- ohora’s pro loose skin remover
- ohora’s pro nail primer
- ohora’s pro nail strengthener
- Different color schemes
- Sparkle gel polish to accentuate your nails

What Goes Great With Gel Manicures?
Now that you’re well on your way to having impeccably perfect nails all the time, it’s time to put the focus elsewhere! Check out our other articles on hand, nail, and hair health to rock the most fab digits year-round:
